Creating a slider with images and videos has never been easier—plus, it’s a very intuitive way to showcase those amazing photos that wouldn’t fit on a printed page.
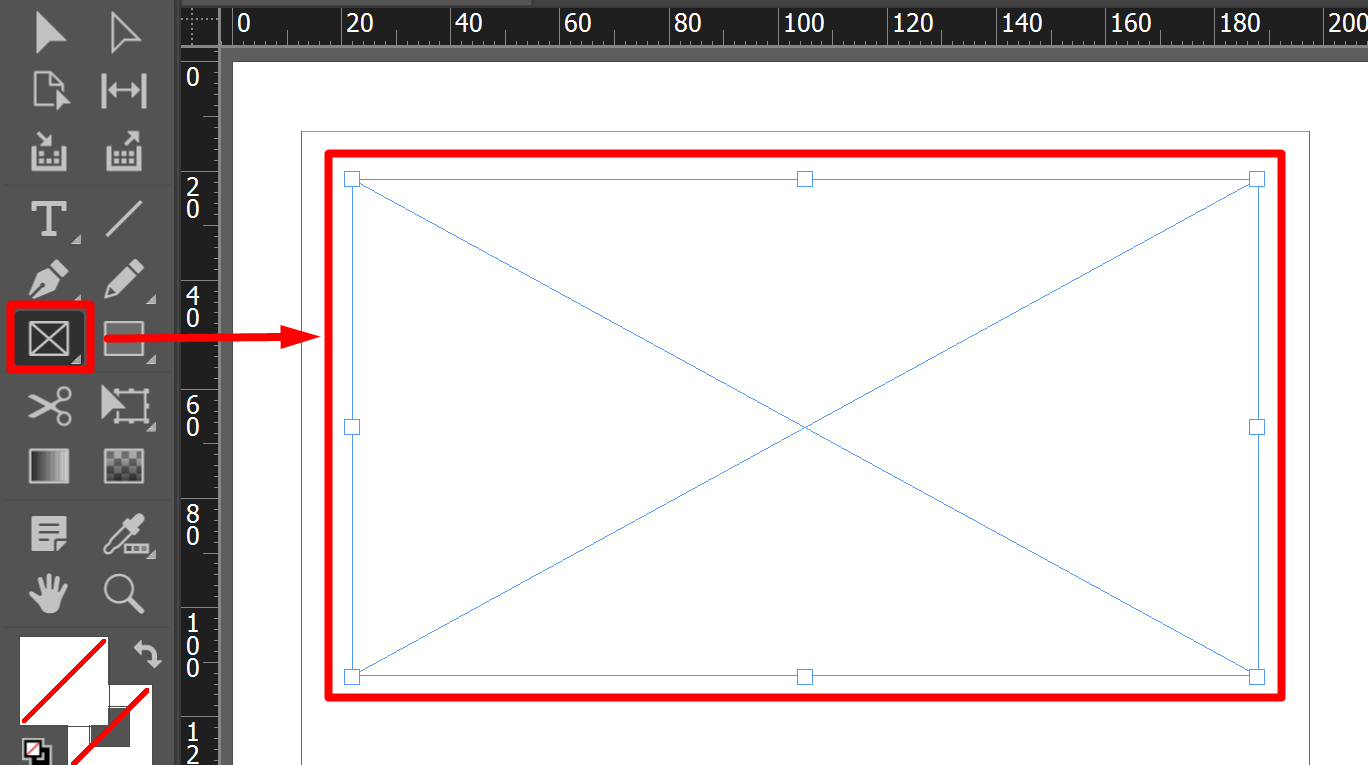
The first step is to create a Rectangular Frame with the aspect ratio of your photos or videos, in the orientation you need (vertical or horizontal), and keep it selected.
- In the plugin, click on the Enrichments section, then select the Slider option.
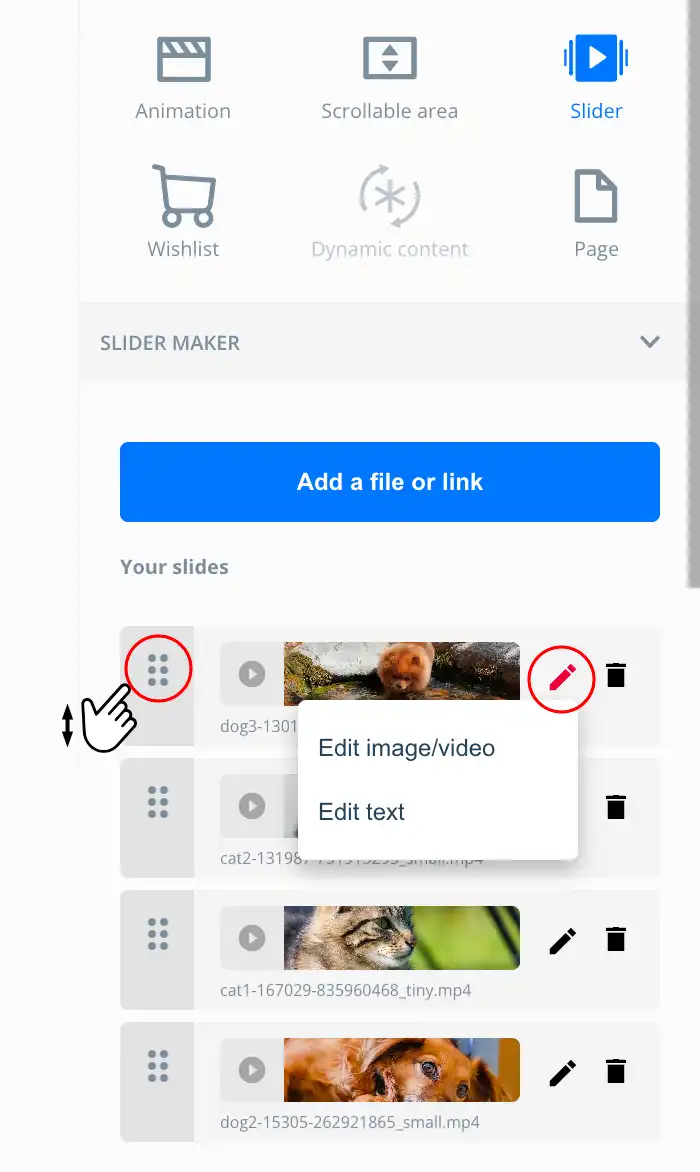
- Click on Add a file or link to begin adding images and/or videos.
- You can use local files, upload them beforehand to Drive, or use YouTube video links.

Configure Your Slider
Organize your files
The six-dot icon (on the left) lets you drag items up and down to change the display order.
The pencil icon allows you to replace the image/video.
The trash icon lets you remove the file from the slider.
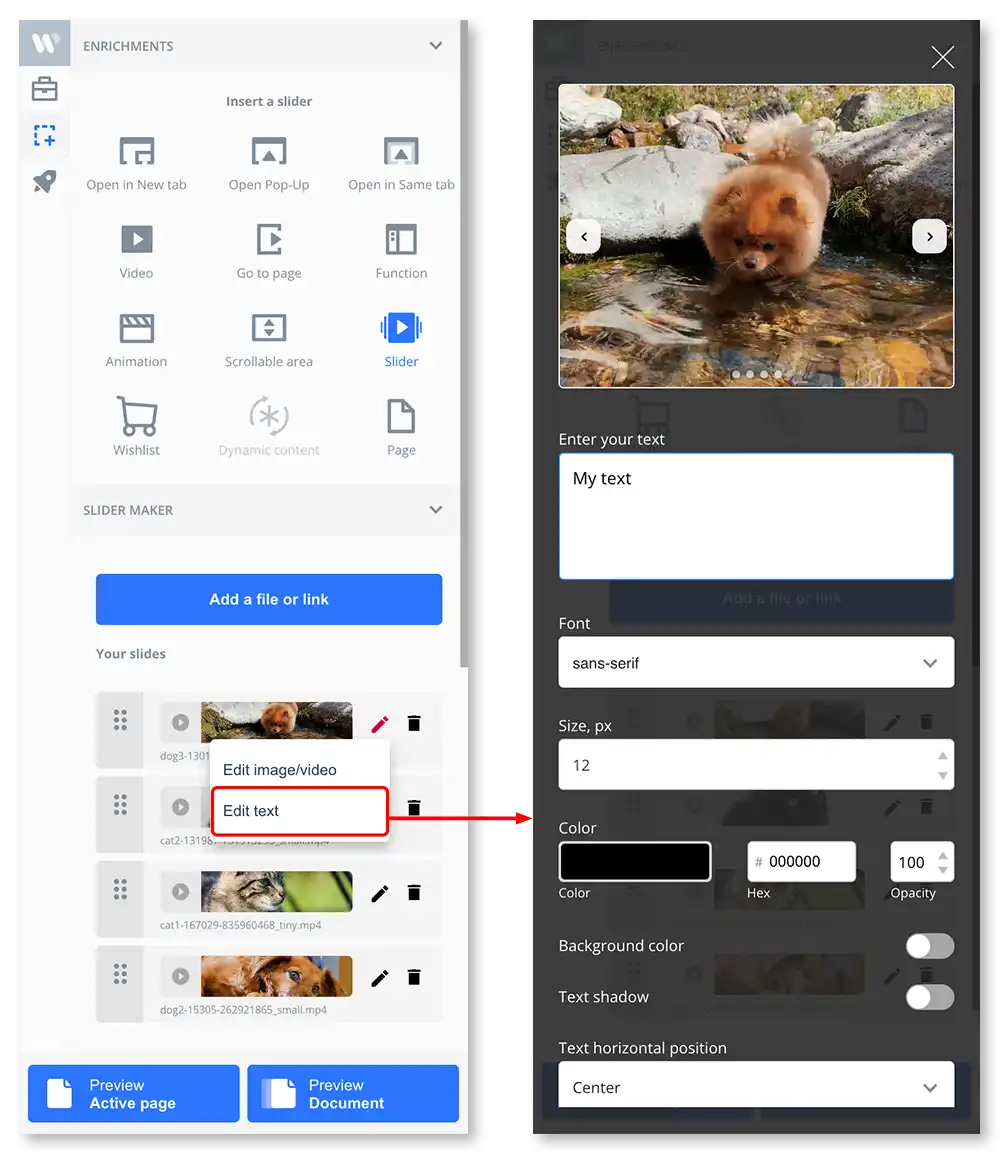
Add text to your slides
- The pencil icon allows you to add text to the slide. With this option, you can:
- Set the vertical position of the text: top, center, bottom, over the slide, or below the slide
- Write your text
- Choose between a sans-serif or serif font
- Set the text size in px
- Set the color and opacity of the text
- Add a background box or shadow behind the text
- Set the horizontal position of the text: left, center, or right
Slider Settings
- Appears on click: opens the slider in full screen when clicking the area it occupies in the rectangular frame. The slider does not appear on the page itself.
- Scale image in slide: enable this to make images fill the entire frame regardless of their size or proportions.
- Arrows always visible: enable this to keep the navigation arrows always visible.
- Fullscreen icon: enable this to always show the fullscreen icon.
- Autoplay: enable this to make photos/videos advance automatically. You can set the interval before the next slide appears.
- Autoplay delay: the time in seconds between the automatic slide transitions
- Ken Burns effect (auto zoom): enable this for animated zoom between slides. Then, set the zoom percentage.
- Auto zoom level: adjust the scale factor for the zoom effect. For example a factor of 1.5 will make the slide zoom by 50%.


No comments.