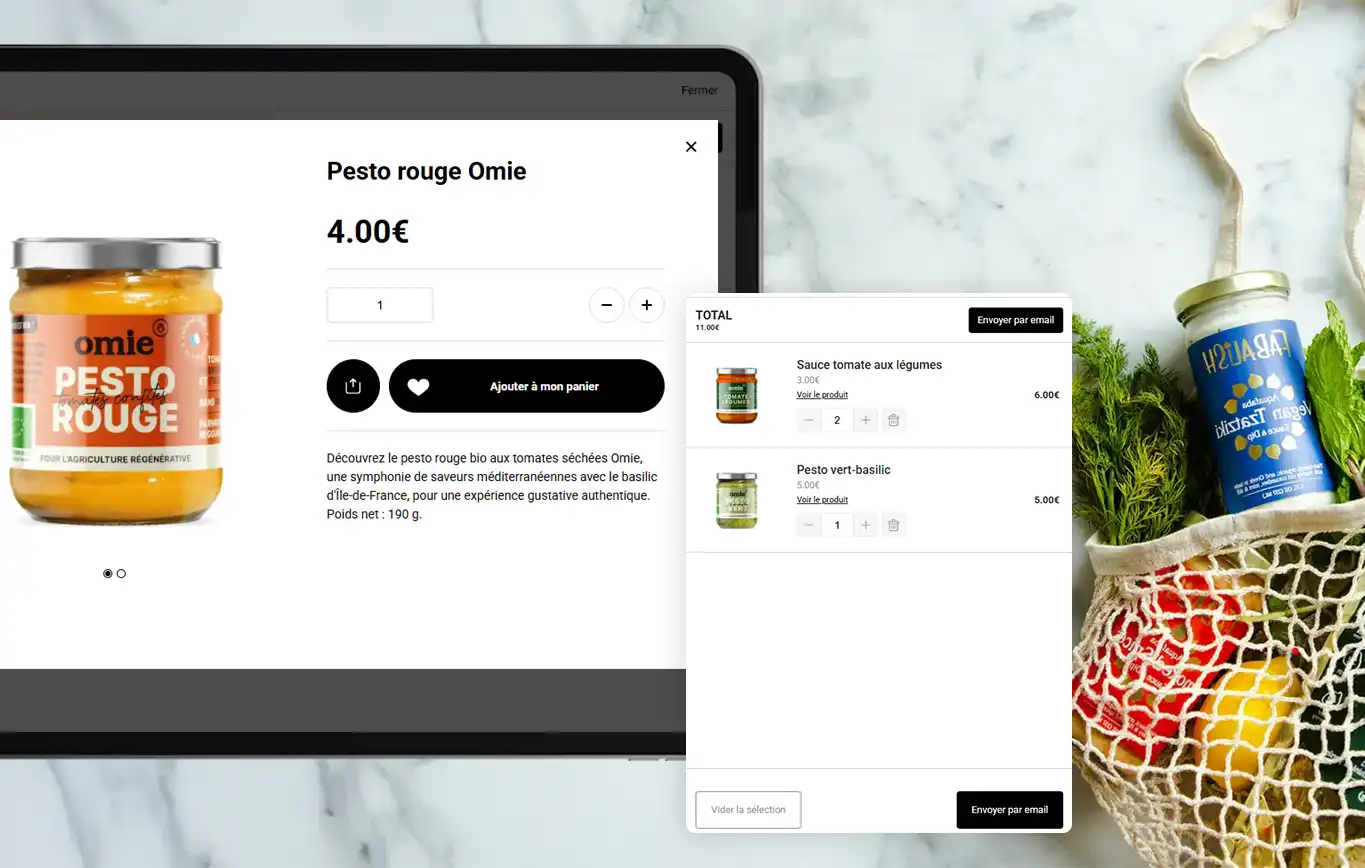
With Webpublication, you can independently create a product catalog using InDesign and our online platform. Users have the option to add products to a Wishlist, which they can share or use to manage future orders.
Scroll down for a Step-by-Step Video Tutorial, or continue reading and follow these instructions:
Part 1: Configuration in Webpublication
- Create the publication in InDesign using the plugin.
- Access the Webpublication Drive, find your publication, and click on Edit > Settings > Advanced Options > Wishlist.
- Check the box "Enable Wishlist."
- Upload the product information:
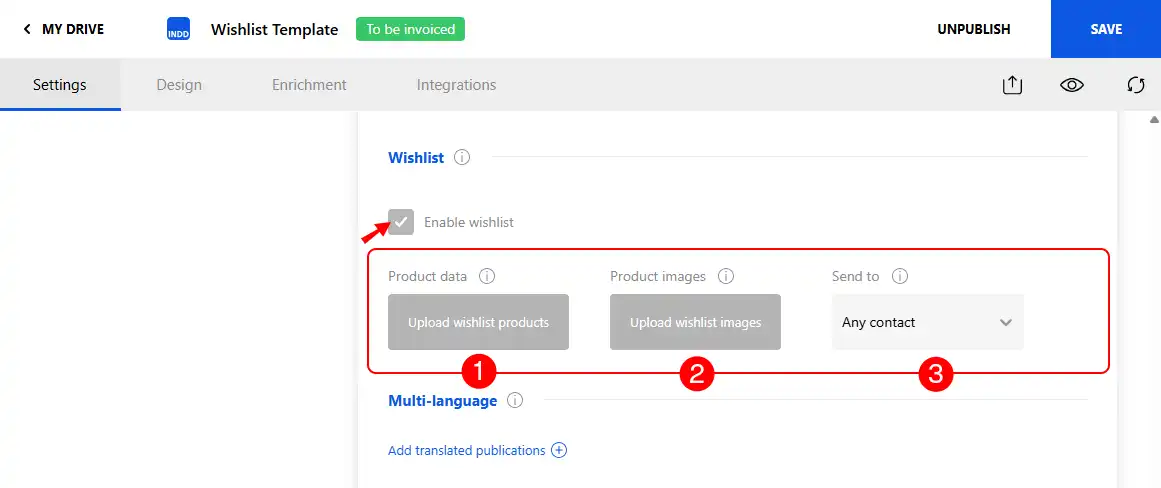
1. Product Data:
- Click on the "i" icon to download a sample Excel file.
- Fill in the file with your product data for the Wishlist. Each product must have a unique reference in the "ref" column.
- In the "Page" column, indicate the page number where the product appears in the catalog.
- In the "image" column, enter the file name of the product image.
- Modify the column headers as needed. The first two columns must always be "ref" and "Page."
- Click "Upload Products" to upload your Excel file. You can update this file at any time.
2. Product Images:
- Create a ZIP file with all the product photos. Make sure each file name matches the names entered in the "image" column of your Excel file.
- Click "Upload Images" to upload your ZIP file.
3. Send To:
- Choose between "Custom Contact" (the user can share the Wishlist by email with a specific contact) or "Distributor" (the user can share the Wishlist with predefined distributors or any chosen contact).
- If you choose "Distributor," a button will appear allowing you to upload your list of contacts. Download a sample Excel file by clicking on the "i" icon, then upload it using the "Upload Distributors" button.
Part 2: Setup in InDesign
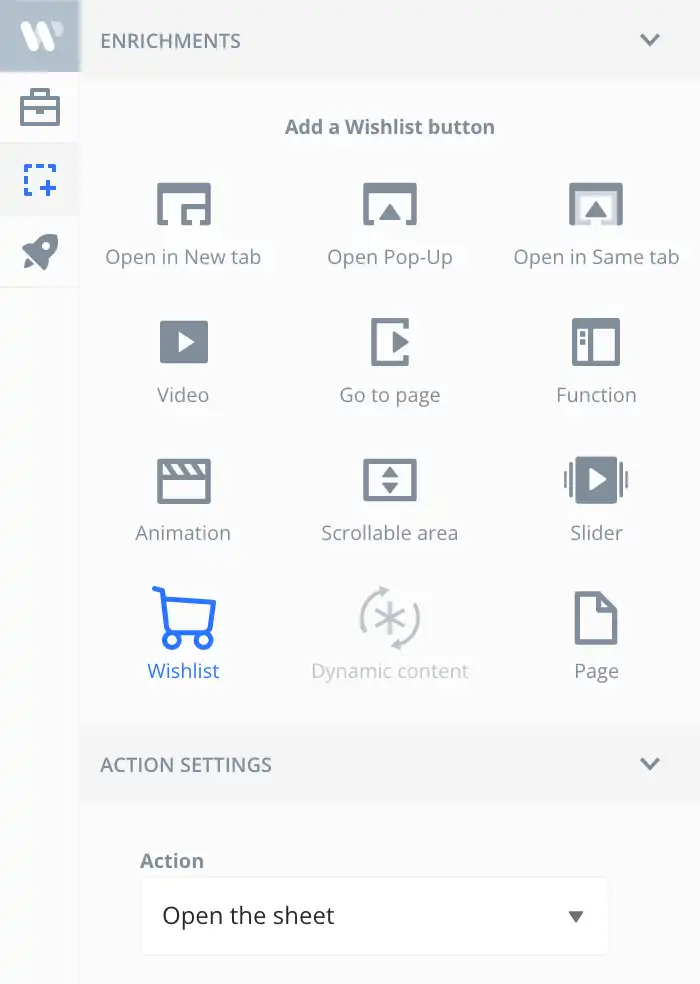
1. In InDesign, add a button to each product that allows users to add products to their Wishlist.
2. Select the button you created, then go to Enrichments > Wishlist in the plugin.
3. Under "ACTION SETTINGS," choose what the button should do:
- Open product card before adding the product to the Wishlist, or
- Add to cart directly to add it to the user’s selection.
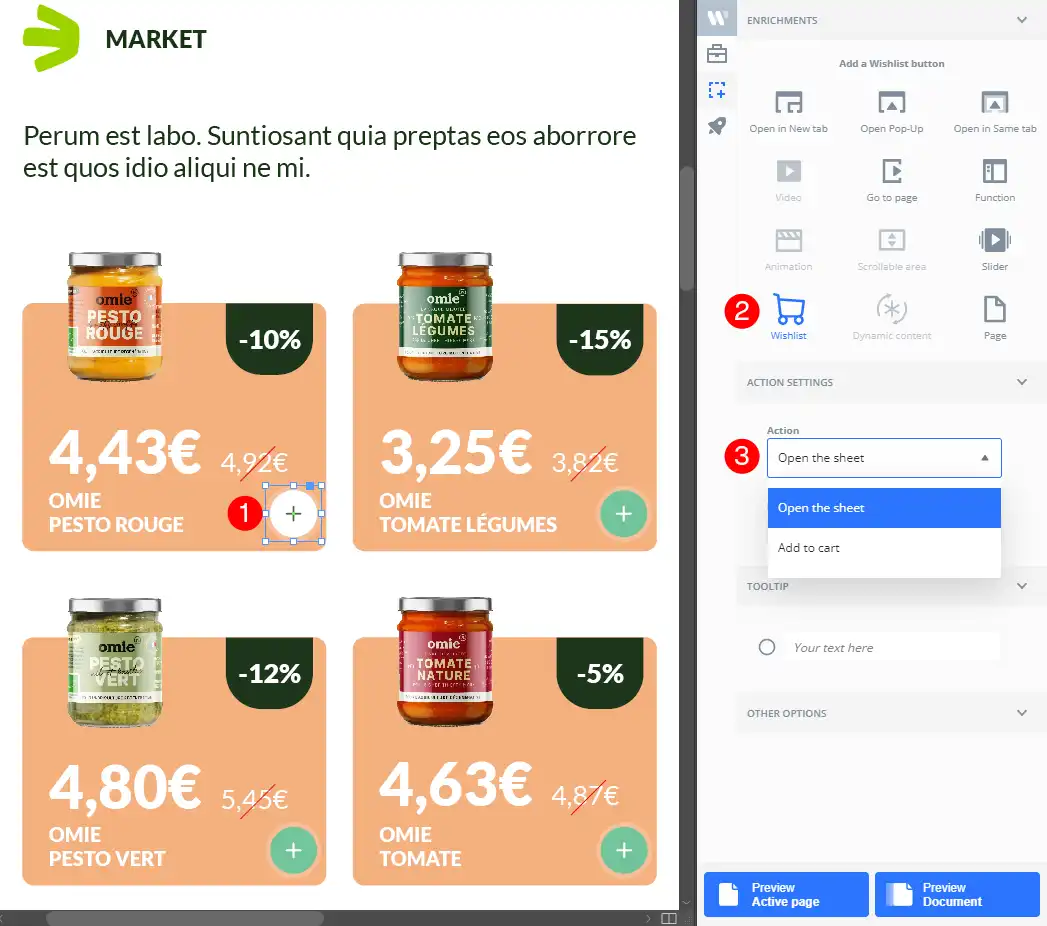
4. Enter the product reference, making sure it matches the value entered in the "ref" column of the Excel file.
5. Repeat these steps for all products.
Finally, click Project Finalization > Save Online when finished to update your project and activate your Wishlist.
IMPORTANT: The Wishlist is available at no additional cost for all clients subscribed to Webpublication’s Gold Plan. For other plans, please check our pricing page or contact your sales representative.


No comments.