Your Interactive Publication in 6 steps!
You are 5 minutes away from your digital publication! Check out our Tutorial below for detailed explanations on how you can quickly create your interactive content.
This document is addressed to all those who wish to create a digital brochure, an interactive press kit, a mini-site, etc. Follow these 6 steps to a successful interactive publication.

If you have not downloaded the new version of the plugin, please follow the steps here
Step 1: create your InDesign file.
You will need two different InDesign files:
- a file for your publication,
- another to group all your popups.
Step 2 : set the pages display mode for your publication.
Choose the most appropriate mode for your output.
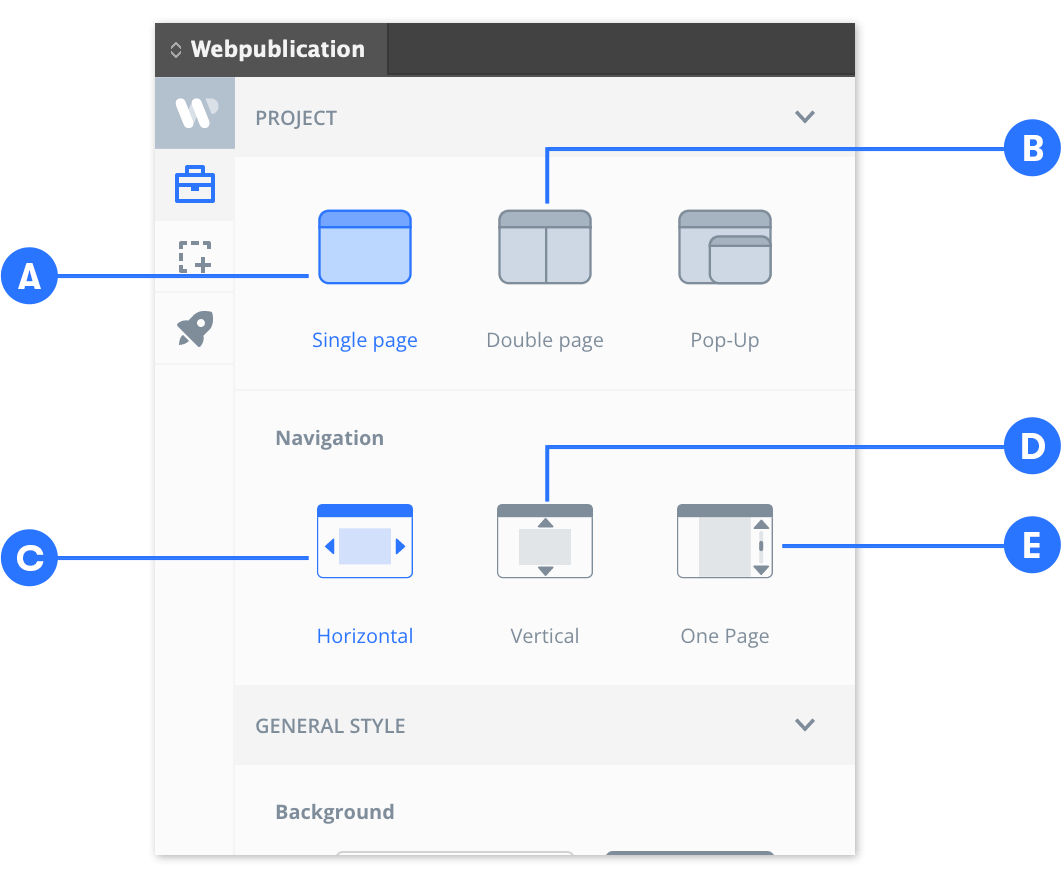
A - Single page mode (not recommended for mobile)
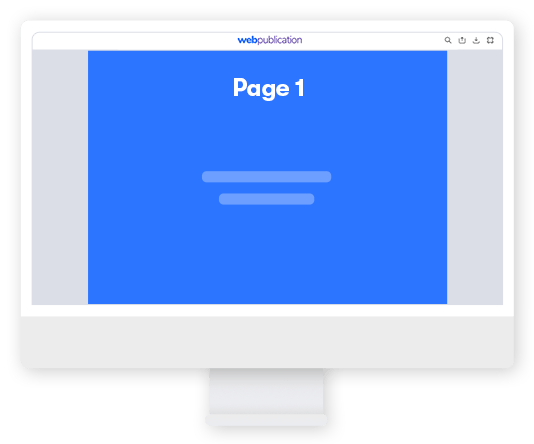
Create the file for your publication. We recommend a document size of 2048x1450px in landscape format. On computer, tablet and mobile, the pages will be displayed one by one in full screen. The mobile experience is better in landscape mode. NB: all pages must be in the same format.
Example: Renault Press Kit
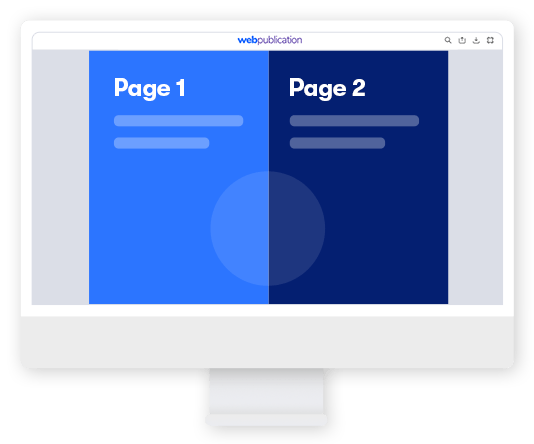
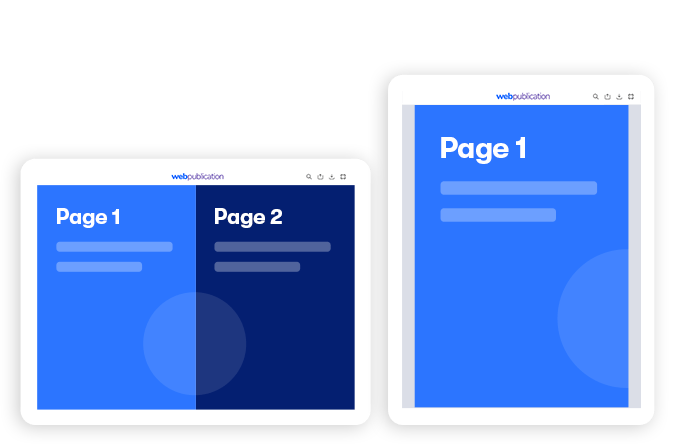
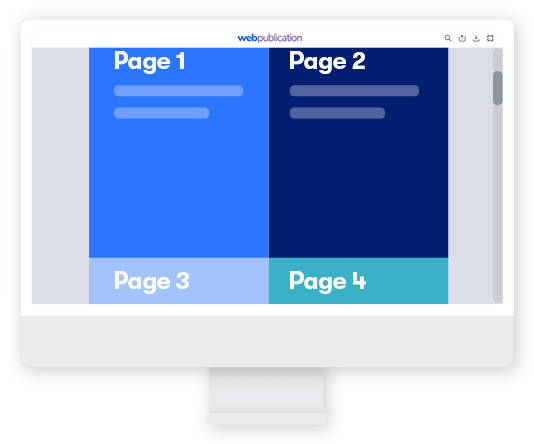
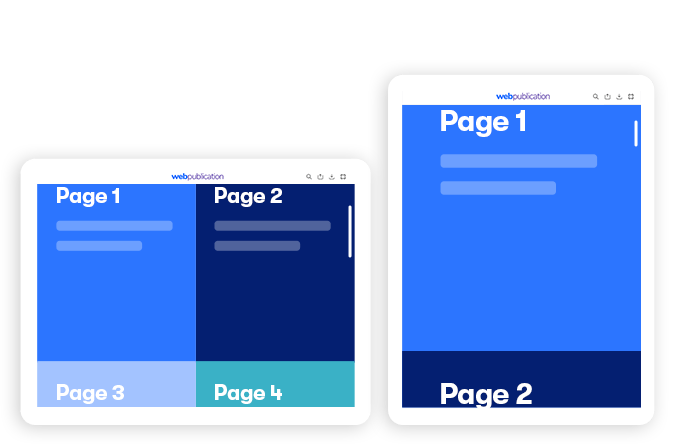
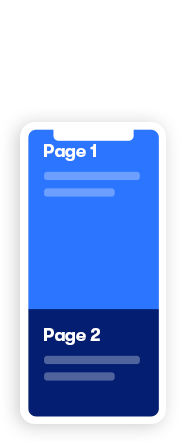
B - Double page mode (responsive - suitable for mobile devices)
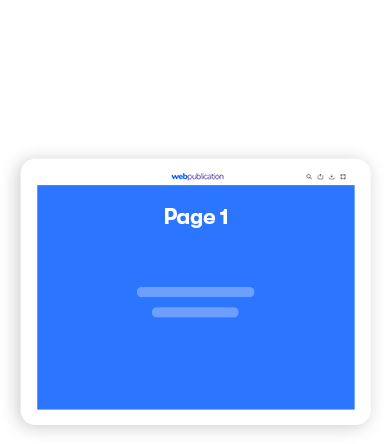
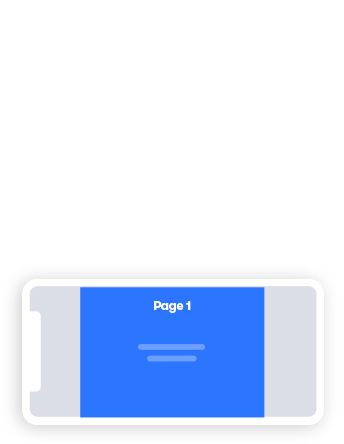
Create the file for your publication. The page size should be 1024x1450px in the double page mode. On a computer, the double pages will be displayed side by side in landscape mode. On mobile and tablet devices in portrait orientation the pages will be displayed one after the other. This mode is preferred for “mobile friendly” publications. NB: all pages must be in the same format.
Example: Anpère Magazine


Concerning the “Double page” mode, now you have the option to choose a Simple page cover, a Double page cover or to Reorganize pages manually.
With this new option, you will be able to create more imposing responsive publications.
You can alternate “Double Page” spreads with “Single Page” spreads.
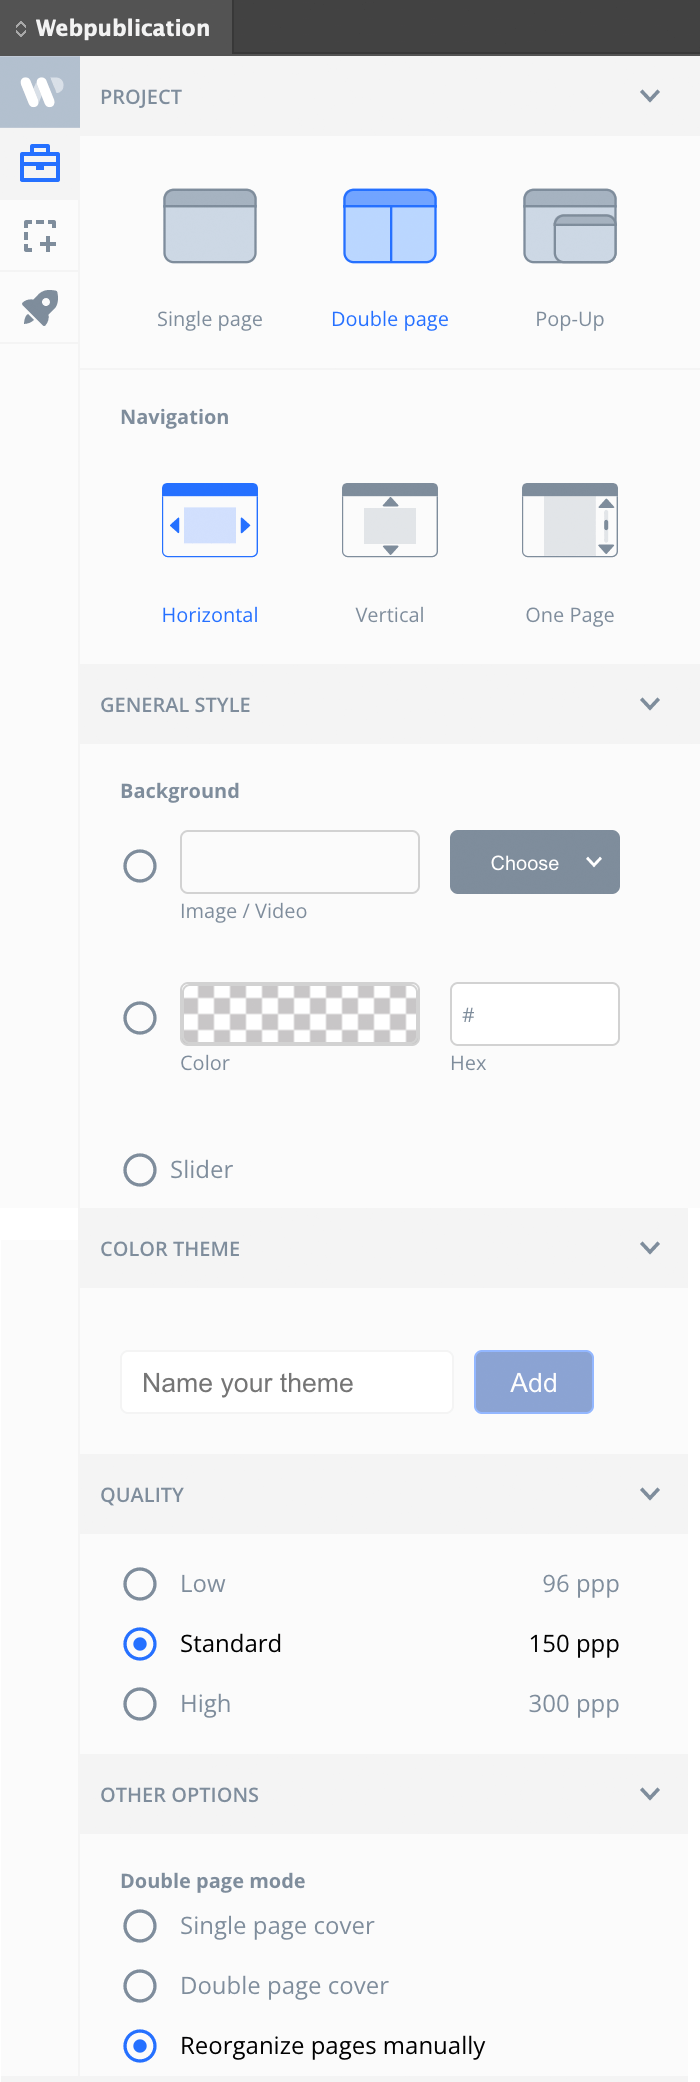
Navigation modes
C - Horizontal Navigation
Choose this option if you would like to navigate to the next/previous page by swiping to the left/right or by clicking on navigation arrows situated on the right/left side of the page. On mobile devices this navigation mode automatically switches to vertical.
D - Vertical Navigation
Choose this option if you would like to navigate to the next/previous page by swiping to the top/bottom or by clicking on navigation arrows situated at the bottom of the page.
In both Horizontal and Vertical navigation modes the pages transition as a whole and it is not possible to scroll between pages.
E - One Page
With this mode all of the pages in the publication are seamlessly stacked in a single scrollable column of content. In other words the pages become sections of a single page similar to a website. When "Double page" mode is selected both of the facing pages in the spread will be displayed on wide screens while only a single page will be displayed on mobile devices. In this case we recommend the size of each page to be 1024x1152px. This way when the pages are viewed in a spread the aspect ratio will be 16:9 and match exaclty the size of the screen on standard FullHD monitors in fullscreen mode. You can see this illustrated on the figures below:
Step 3 : optimize the readability of your publication.
1 - Density of text and information
Whether you start from an existing document or decide to create your publication “from scratch”, avoid putting too much content on the first level of reading.
When there is too much information on a page, consider moving some of your content into a popup to optimize the reading experience.
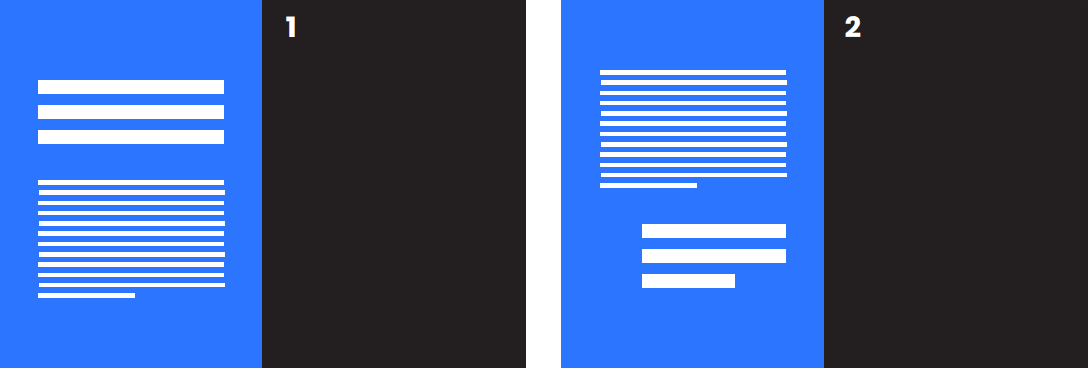
Here are two examples to show you how to simplify the first level of reading.
Here we added pages.
Print document
High density of text.

Digital document
Less text, larger images. The double page mode for mobile is appropriate.
Here, we have deported part of the text in popups (second level of reading).
Print document
High density of text.
Digital document
Less text, larger images. The double page mode for mobile is appropriate.

2 - Typography
You can keep your typography. You are no longer limited to web typography.
Always check if your text is readable on the devices you are targeting. To test your desktop version, click
“Preview” from our plugin.
Use the “Share” function to test it on mobile and tablet.
NB: the simplest rule is to double all the fonts sizes.
Example: if your font size is 9 on your print version, it will be 18 on its digital version.

The texts must be regrouped on the same layer, which is placed at the top of the stack.
3 - Image optimization
Optimize images before adding them to the document. Large images will be downscaled, so it is recommended that you avoid using images larger than 2048 px.
Step 4 : enrich your publication.
You can now start enriching your publication!
First select a button (made with the “Buttons and Forms” panel in InDesign) or create a rectangular frame  to create the enrichments A to G here below.
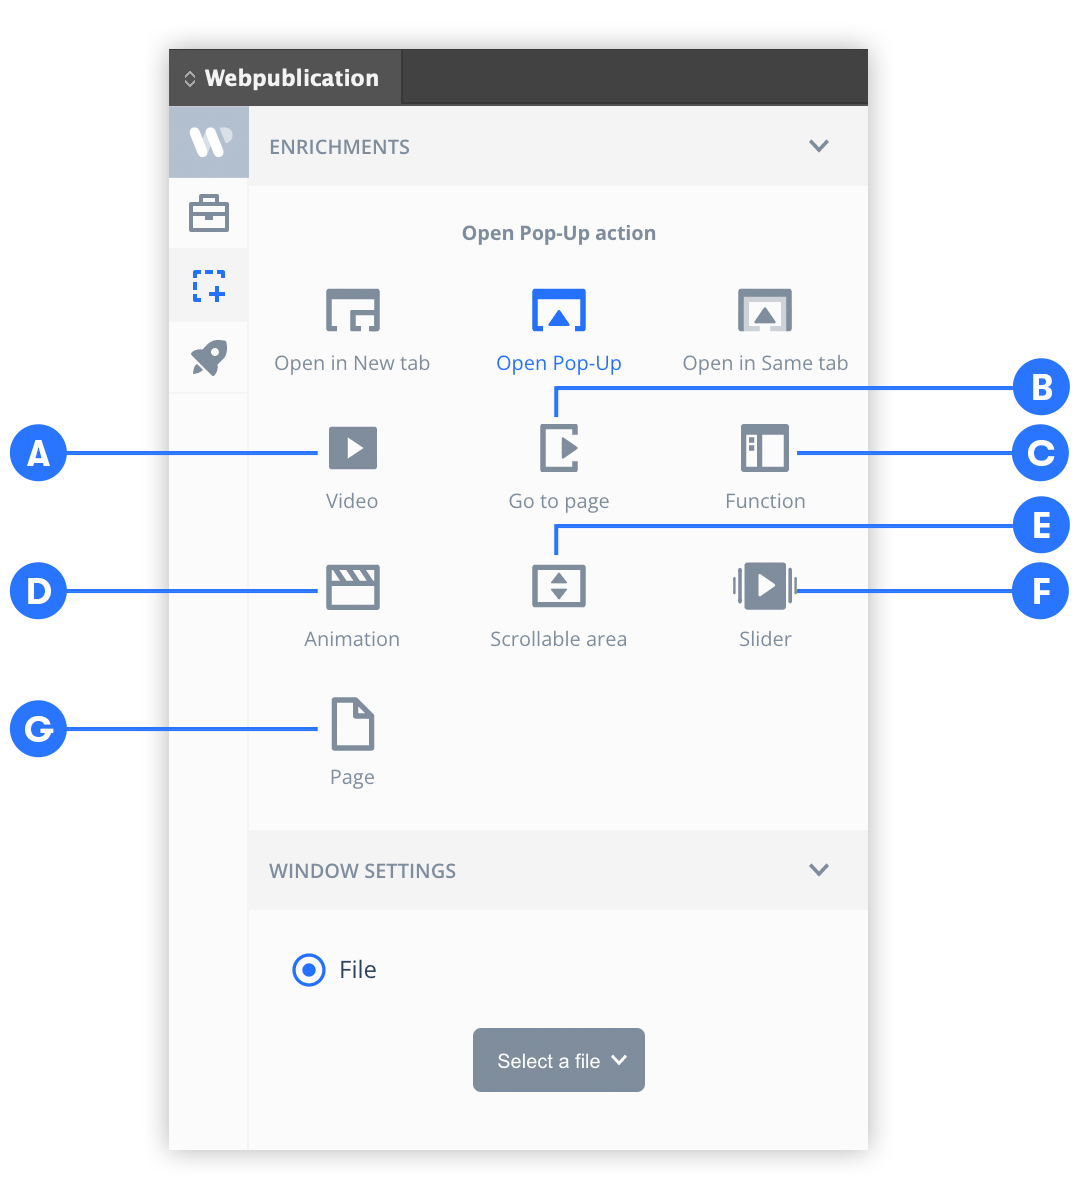
A - Video
To insert a video into your document, create a rectangular frame where your video will be placed. Then select “Insert a video” and upload it. Our solution will convert your video automatically to mp4 format. You can also choose to insert a Youtube link.
B - Go to page
To create a direct link to a page in the publication, click “Go To Page” and enter the number of the page where you want to redirect your reader.
C - Panel
Select a button (made in InDesign with Buttons and Forms) or create a rectangular frame to apply one of the following actions:
- Share: Opens the sharing panel that allows sharing on mail, social networks etc.
- Thumbnail: Displays the thumbnails of the publication.
- Favorites: Displays the Favorites page.
- Search: Opens the search page of the publication.
- Summary: Opens the contents panel of your publication.
D - Animation
- Pre-animated resources. You will find buttons and animated graphics, slideshows and animations of titles to download on Webpublication academy. A simple copy and paste of the resource in InDesign and some modifications (color, text) will be enough to adapt the animation to your publication.
- InDesign animations.
Use InDesign palettes (Window> Workspace> Digital Publishing) to simply make your own animations - Animate or HTML Animations.
Compress your Animate or HTML animations in .zip format before importing them. Then create a rectangular frame , select “Enrichment > Animation” using the plugin and then upload your animation.
E - Scrollable area
When the content is too large to fit the frame, one possible solution is to create a scrollable area for it. Check out our tutorial for creating scrollable areas and buttons in scrollable areas.
F - Slider
Sliders are a great way to display several images and videos in the same frame. Check out our tutorial for more information.
G - Page
Here you will find settings which apply for the whole page. You can set a background for the page, which may be an image, a video or even a slider. You can also make the page transparent which combined with a fascinating background can make your page even more impactful. You can also make the page Editable which allows you to make modifications to it from our Administration area or inside the Uprez application.
You can also enrich your popups with rich media content!
Your popups can contain InDesign animations, videos, images, pdf, as well as links to pages in your publication or to external sites.
Step 5 : add your popups.
Create a new InDesign file that will group all your popups. Your popups should be the same width (we recommend 1366 px wide for a compatible desktop and tablet, and 600 px wide for compatibility computers, tablets and mobiles) but their heights may vary.
Example mypopups.indd.
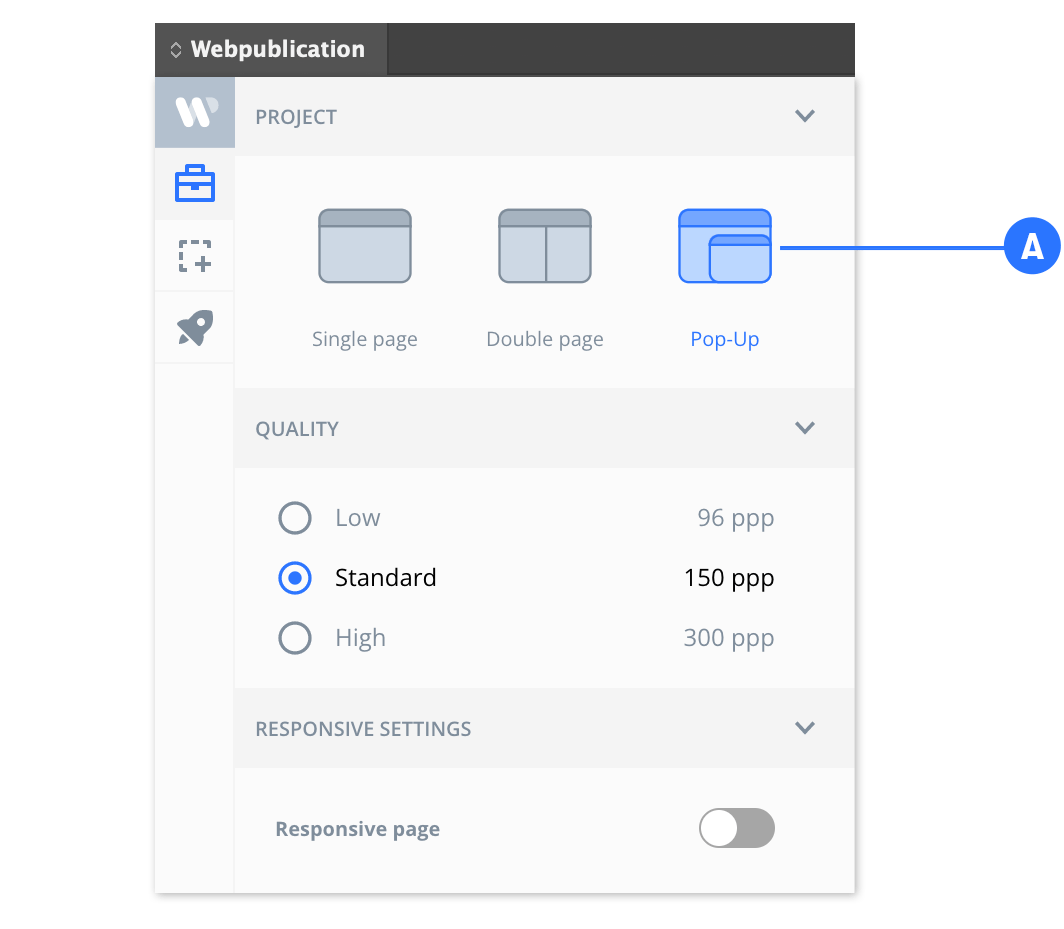
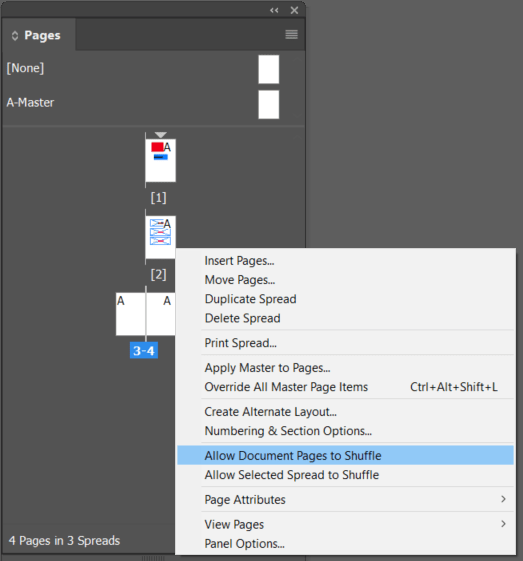
In our plugin, go to the “Project” tab, and apply the “Popup” mode (screenshot of the plugin - A). Your InDesign popup file is now created. Save each active page using the plugin, this action will create a popup per active page on our solution. Having all the popups in a single InDesign file it is very practical.
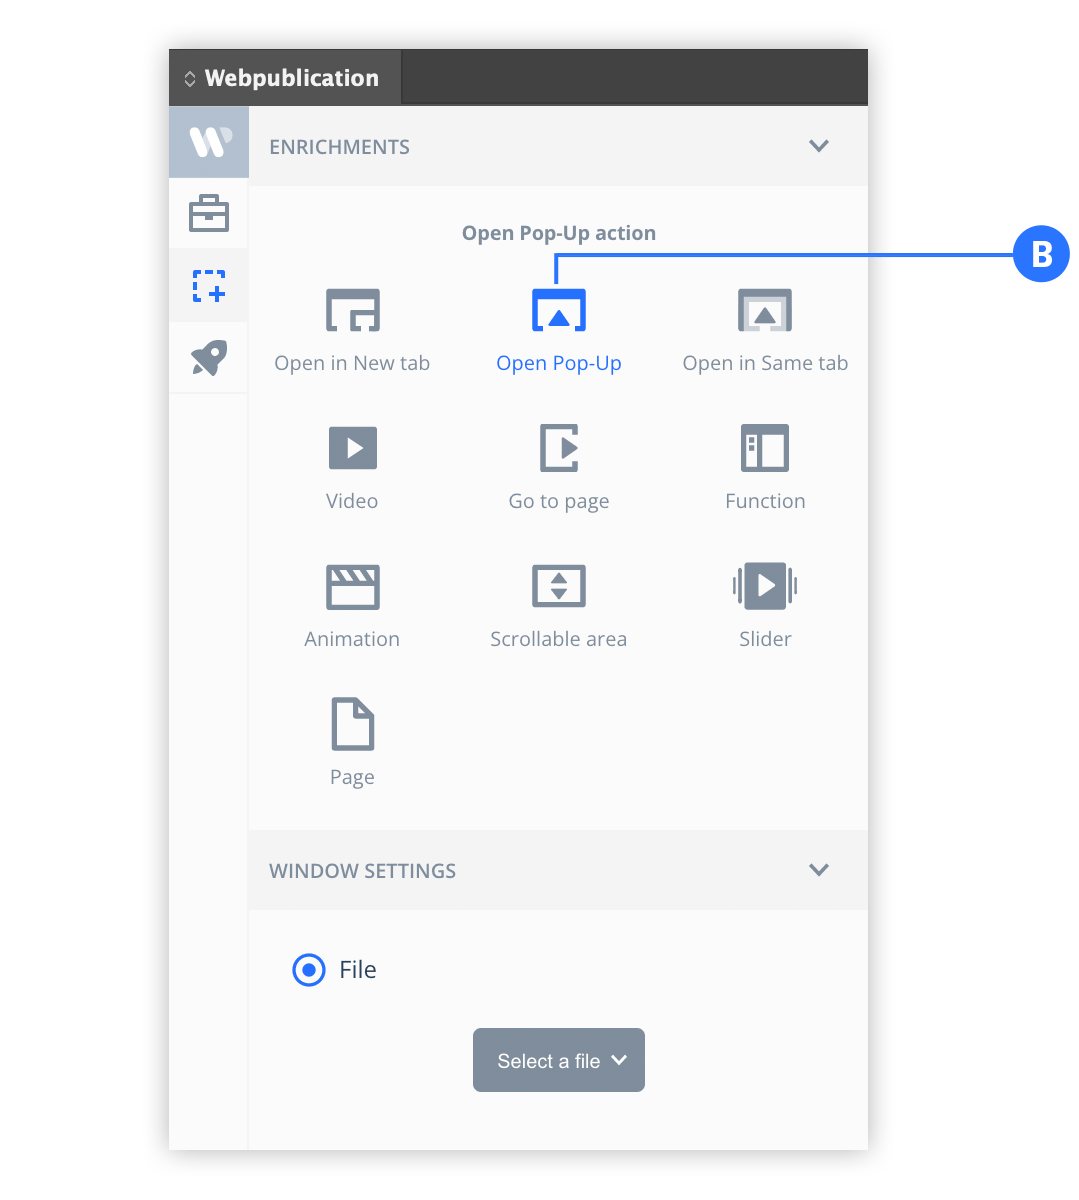
To link your popups to your publication, create a button or a “Rectangular Frame” in your Publication file. Select it and click on “Open popup” (screenshot of the plugin - B).
Your popup can contain InDesign animations, videos, images, pdf as well as links to pages of your publication or to external sites.
Step 6 : upload your publication and customize the interface.
You’re almost done, all you have to do is to complete your publication!
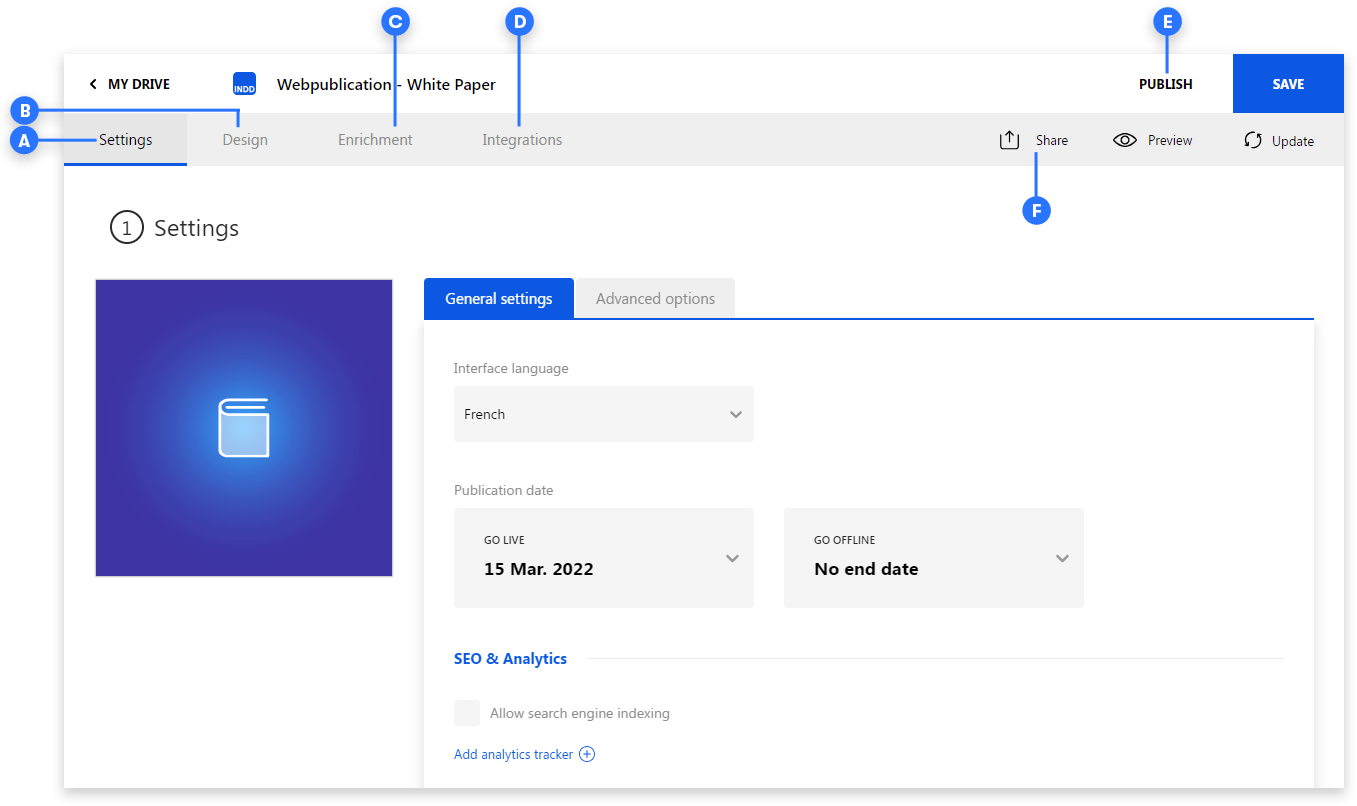
In the plugin, click on “Project Completion> Manage Settings” to set the final details for your publication.
You will be redirected to our platform. If you weren’t already logged in, enter the credentials of your account (the same as for the plugin).
Now complete your publication:
A - Settings: set the parameters you want to activate. Release dates, Google analytics code, interface language etc.
B - Design: customize the interface with your logo, choose the icons, set the color for the bar, for the background etc.
C - Enrichment: this tab opens the publication in the Uprez Editor. There you can add, remove and reorder the pages. If you have enabled the Editable checkbox for some of the pages in the Plugin (Enrichments > Page) you will be able to modify these pages in the Editor - Change their background, modify the texts, images, videos, sliders, color themes etc.
D - Integration: get the url of the project, or download your master.
E - Publish publish your publication to a definitive URL (50 credits).
NB: the “Share” function (F) allows you to validate, for free, your projects with your customers or your colleagues.
Useful links


© Netinteractive - All rights reserved